Table of Contents
When you’re managing hundreds or even thousands of acres of hunting property, keeping tabs on wildlife movement can feel like finding a needle in a haystack. Traditional scouting methods only reveal fragments of the bigger picture, leaving you guessing about migration patterns, herd behavior, and that one trophy buck’s favorite travel corridor. This is where modern long-range trail cameras transform from convenient gadgets into essential hunting tools, acting as your eyes in the field when you can’t physically be there.
The technology has evolved dramatically, and what qualifies as “long-range” today would have seemed like science fiction just a few years ago. We’re talking about detection zones that span the width of a clear-cut, night vision that reaches beyond 100 feet, and cellular connectivity that brings real-time intelligence straight to your smartphone. But with all these advancements comes complexity—not every camera marketed as “long-range” truly delivers the goods for vast hunting grounds. Understanding the mechanics behind detection capabilities, power management, and strategic placement will make the difference between a valuable scouting network and an expensive collection of mediocre photos.
Top 10 Long Range Trail Cameras
Detailed Product Reviews
1. GardePro E8 2.0 WiFi Trail Camera (Non-Cellular), 4K Video & 64MP Photo, 165ft Long-Range Dual Antennas, Live View, No-Glow IR Night Vision, Motion Detection

Overview: The GardePro E8 2.0 delivers premium trail camera performance with its innovative WiFi connectivity and stunning 4K video capabilities. This non-cellular model connects directly to your smartphone via Bluetooth and built-in WiFi, eliminating monthly fees while providing remote access up to 165 feet away. Designed for wildlife enthusiasts and property owners, it captures ultra-sharp 64MP photos and smooth 4K footage, even in complete darkness using no-glow infrared technology.
What Makes It Stand Out: The dual-antenna system provides exceptional WiFi stability and range, a significant improvement over single-antenna competitors. The Live View feature transforms wildlife monitoring by letting you preview your camera’s perspective in real-time during setup and observe animals without physical disturbance. The GardePro Mobile app offers intuitive control, allowing instant media downloads and settings adjustments without ever touching the camera or removing the SD card—perfect for sensitive locations.
Value for Money: While priced higher than basic trail cameras, the E8 2.0 justifies its cost by eliminating cellular subscription fees that can exceed $100 annually. Compared to cellular models, it pays for itself within two years. The 4K video resolution alone separates it from 1080p competitors, making it ideal for researchers and serious wildlife documentarians who need maximum detail.
Strengths and Weaknesses: Pros include outstanding 4K video quality, impressive 165ft WiFi range, intuitive app integration, and invisible night vision. Cons are significant: it cannot connect to home WiFi networks, requires direct smartphone proximity, and physical obstructions dramatically reduce range. PC and laptop connectivity are unsupported, limiting workflow flexibility.
Bottom Line: The E8 2.0 excels for users prioritizing video quality and wireless convenience without recurring costs. Best suited for private property or dedicated wildlife plots where you can periodically visit within WiFi range. For remote deployments requiring true off-grid access, consider a cellular alternative.
2. Meidase P300 Pro (Non-Cellular) WiFi Trail Camera 2025 New, Dual-Antenna 165ft Range, 7800mAh Battery, 64MP Photos, 1296p HD Video, 0.1s Trigger, 100ft No Glow Night Vision, App Control

Overview: The Meidase P300 Pro enters 2025 as a formidable WiFi trail camera competitor, emphasizing power efficiency and lightning-fast performance. Its integrated 7800mAh rechargeable battery sets a new standard for longevity, while dual antennas maintain stable connectivity up to 165 feet. Capturing 64MP photos and 1296p HD video with audio, it balances resolution with extended field operation, making it ideal for remote wildlife monitoring and security applications.
What Makes It Stand Out: The 0.1-second trigger speed combined with a 120° wide detection angle ensures you rarely miss fast-moving subjects—a critical advantage over slower cameras. Solar panel compatibility (SP300, SP350, SP1000) enables truly autonomous operation, perfect for researchers needing year-round data collection without battery changes. The Live Preview function streamlines camera positioning, saving multiple trips to the field.
Value for Money: Positioned competitively against GardePro’s WiFi lineup, the P300 Pro offers superior battery life at a similar price point. The included 7800mAh battery eliminates the cost of disposable batteries, providing environmental and financial savings over time. While it lacks 4K video, its 1296p resolution remains crisp for most applications, delivering 80% of the performance at 100% of the battery advantage.
Strengths and Weaknesses: Pros include exceptional trigger speed, ultra-wide detection angle, massive battery capacity, and seamless solar integration. Cons include lower video resolution than 4K competitors, shorter 100ft night vision range versus some rivals, and Meidase’s smaller brand ecosystem compared to established players.
Bottom Line: The P300 Pro is perfect for users who prioritize battery longevity and capture speed over absolute video resolution. Wildlife researchers monitoring high-traffic trails will appreciate its responsiveness and power efficiency. If 4K is non-negotiable, look elsewhere; for reliable, long-term deployment, it’s a top contender.
3. GardePro E5S Trail Camera (Non-Cellular, Non-WiFi), 64MP Photo & 1296P HD Video, 0.1s Trigger, 100ft No-Glow Night Vision, Motion Activated Wildlife Camera

Overview: The GardePro E5S strips away wireless complexity to deliver a pure, reliable trail camera experience. This non-cellular, non-WiFi workhorse focuses on core performance: capturing 64MP photos and 1296P HD video with a blistering 0.1-second trigger speed. Powered by 8 AA batteries and featuring an IP66 waterproof rating, it’s built for hunters and researchers who prefer simplicity and maximum battery life in harsh outdoor environments.
What Makes It Stand Out: The E5S’s ultra-low power consumption is its defining trait—without wireless radios draining energy, batteries last months longer than WiFi-enabled counterparts. Three PIR sensors provide exceptional motion detection coverage and speed, while the standard 1/4"-20 mounting thread ensures compatibility with most tree mounts and tripods. Its no-frills design means fewer components to fail, translating to exceptional field reliability.
Value for Money: As the most affordable option in this lineup, the E5S delivers professional-grade image quality at a budget price point. You sacrifice wireless convenience but gain freedom from monthly fees, app dependencies, and battery anxiety. For users monitoring multiple cameras across large properties, the cost savings compound dramatically, making it the economical choice for scalable deployments.
Strengths and Weaknesses: Pros include outstanding battery efficiency, rugged IP66 construction, rapid trigger speed, and zero ongoing costs. Cons require physical SD card retrieval, no real-time monitoring, and inability to adjust settings remotely—each visit risks disturbing wildlife and demands time investment.
Bottom Line: The E5S is ideal for remote locations where infrequent checks are planned, or for users who value reliability over convenience. It’s the “set it and forget it” champion. If you need immediate image access or have limited mobility, invest in a WiFi model instead. For pure hunting and long-term research, it’s unbeatable.
4. GardePro E8 2.0 Pro WiFi Trail Camera (Non-Cellular), 4K Video & 64MP Photo, 7800mAh Battery, 165ft Long-Range Dual Antennas, Live View, No-Glow IR Night Vision, Motion Detection
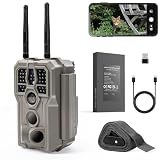
Overview: The GardePro E8 2.0 Pro represents the pinnacle of the E8 series, combining the flagship’s 4K video capabilities with a massive 7800mAh rechargeable battery for extended field operation. This non-cellular WiFi camera maintains direct smartphone connectivity up to 165 feet via dual antennas, while the GardePro Mobile app provides live view, settings control, and media management without subscription fees. It’s engineered for serious wildlife documentarians needing premium performance and minimal maintenance.
What Makes It Stand Out: The integrated rechargeable battery eliminates disposable battery costs and environmental waste, potentially running a full year on moderate use. When paired with GardePro’s SP350 or SP1000 solar panels, it achieves near-perpetual operation. The 4K video resolution captures intricate behavioral details—like antler velvet shedding or predator-prey interactions—that lower resolutions miss, making it invaluable for research and educational content creation.
Value for Money: The premium over the standard E8 2.0 is justified after just two battery change cycles, saving $40-60 in AA batteries annually. Compared to cellular cameras with $10/month fees, it breaks even in 18 months while delivering superior video quality. For professional users, the time saved from fewer site visits alone warrants the investment.
Strengths and Weaknesses: Pros include best-in-class 4K video, exceptional battery life, robust dual-antenna WiFi, and true no-glow night vision. Cons mirror the E8 2.0: no home WiFi or PC support, range limited by obstructions, and higher upfront cost. The battery, while long-lasting, eventually requires replacement unlike standard AAs.
Bottom Line: The E8 2.0 Pro is the ultimate choice for dedicated wildlife monitors who demand 4K quality and hate battery maintenance. If your budget allows, the rechargeable battery transforms the user experience. For casual users, the standard E8 2.0 remains sufficient. This is the “set it and forget it” WiFi solution.
5. GardePro E6+ WiFi Trail Camera (Non-Cellular), 64MP Game Camera with Dual Antennas & 165 ft WiFi Range, No Glow Night Vision, Motion Activated
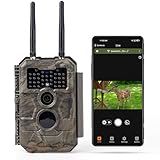
Overview: The GardePro E6+ occupies the sweet spot in the WiFi trail camera market, delivering core wireless features without the premium cost of 4K video. It captures crisp 64MP photos and 1296P HD video while maintaining the same impressive 165-foot dual-antenna WiFi range as its higher-end siblings. The GardePro Mobile app provides live view, instant downloads, and settings adjustments, making it an accessible entry point for users wanting wireless convenience without breaking the bank.
What Makes It Stand Out: The E6+ matches the E8 series’ connectivity prowess—dual antennas, Bluetooth pairing, and 165ft range—at a more accessible price point. Its 940nm no-glow infrared LEDs provide truly invisible night illumination, preventing wildlife spooking while delivering clear monochrome footage. The camera strikes an intelligent balance between resolution and power consumption, offering longer battery life than 4K models while still delivering detailed images suitable for most monitoring needs.
Value for Money: This model delivers 90% of the E8 2.0’s functionality at 70% of the cost. Users sacrifice only 4K video—a feature many never fully utilize—while retaining the game-changing WiFi connectivity and live view capabilities. For property surveillance and general wildlife observation, the 1296P resolution proves more than adequate, making the E6+ the value champion in GardePro’s WiFi lineup.
Strengths and Weaknesses: Pros include excellent WiFi range, strong low-light performance, intuitive app integration, and balanced power consumption. Cons include absence of 4K video, reliance on AA batteries (not included), and the same WiFi limitations as other non-cellular models—no remote access beyond 165ft and no PC connectivity.
Bottom Line: The E6+ is the smart choice for first-time WiFi trail camera buyers and budget-conscious users. It democratizes wireless trail monitoring by cutting the premium video feature most users don’t need. Choose this for general wildlife observation, property security, or hunting over food plots where 4K isn’t critical. For cinematic wildlife documentation, step up to the E8 series.
6. GardePro E8 2.0 Pro WiFi Trail Camera with SP300 Solar Panel, 4K Ultra HD & 64MP, 165ft Long-Range WiFi, Built-in 7800mAh Battery + 64GB SD Card, Dual Antennas, Wildlife Monitoring Camera

Overview: The GardePro E8 2.0 Pro Solar Combo is a premium wildlife monitoring solution that eliminates battery anxiety. This integrated system pairs a high-performance trail camera with a dedicated solar panel, delivering uninterrupted year-round operation for serious nature enthusiasts and property owners.
What Makes It Stand Out: The industry-leading 165ft WiFi range, powered by dual antennas, sets this apart from competitors offering only 50-80ft connectivity. The included 3.5W SP300 solar panel and massive 7800mAh built-in battery create a genuine set-and-forget system. The ability to access original 4K footage and 64MP images via the GardePro app without physically retrieving the SD card transforms fieldwork convenience.
Value for Money: While priced at a premium, the combo delivers significant savings versus purchasing the camera, solar panel, high-capacity battery, and industrial SD card separately. Comparable cellular cameras require monthly data plans, making this WiFi-only model more economical for properties within range.
Strengths and Weaknesses: Pros: Exceptional 165ft WiFi range; complete solar power solution; massive battery capacity; industrial-grade 64GB SD card included; no subscription fees; 4K video quality. Cons: WiFi only—no cellular connectivity; cannot connect to home WiFi networks; higher upfront cost; app connectivity limited to 165ft radius.
Bottom Line: Ideal for users with semi-permanent setups within WiFi range, this combo justifies its premium price through genuine convenience and reliable year-round operation. Serious wildlife researchers and property managers will appreciate the hassle-free power solution and exceptional wireless range.
7. Solar Trail Camera WiFi Bluetooth - Game Cameras with Night Vision Motion Activated Waterproof, Rechargeable Trail Cam with 5200mAh Battery Deer Camera Hunting Wildlife Cameras for Outdoor Backyard

Overview: This solar-powered trail camera offers a compelling mid-range option for wildlife enthusiasts seeking wireless convenience without premium pricing. It combines modern connectivity with eco-friendly operation for backyard monitoring and hunting applications.
What Makes It Stand Out: WiFi6 technology provides faster, more stable connections than older WiFi standards, while the integrated solar panel and 5200mAh battery offer maintenance-free operation. The 0.1-second trigger speed with 100° detection angle ensures minimal missed wildlife moments, and low-glow infrared preserves natural animal behavior.
Value for Money: Positioned as a budget-friendly alternative to premium brands, this camera delivers WiFi6 connectivity and solar charging at a competitive price point. The included 32GB SD card and support for up to 256GB expansion add value, though the initial setup requiring 0.5ft proximity is less convenient than premium models.
Strengths and Weaknesses: Pros: WiFi6 connectivity; integrated solar power; blazing 0.1s trigger; 65ft night vision; IP66 waterproofing; expandable storage; privacy-focused local data processing. Cons: Limited 55ft WiFi range; required close proximity for initial pairing; smaller battery capacity than premium models; brand recognition concerns for long-term support.
Bottom Line: An excellent choice for budget-conscious buyers wanting modern features. While range and battery capacity trail premium options, the WiFi6 upgrade and solid performance make it a smart value proposition for backyard wildlife watchers and casual hunters.
8. GardePro E8 2.0 Pro WiFi Trail Camera (Non-Cellular), 4K Video & 64MP Photo, 7800mAh Battery, 64GB SD Card Included, Dual Antennas, 165ft Long-Range, Live View, No-Glow, Motion Detection

Overview: The non-solar version of GardePro’s flagship E8 2.0 Pro delivers the same exceptional wireless performance and image quality while allowing users to choose their power solution. This model targets serious wildlife observers who may already own solar panels or prefer battery-only operation.
What Makes It Stand Out: The dual-antenna system maintains the impressive 165ft WiFi range found in the solar combo, while Live View capability enables real-time framing and wildlife observation without disturbing habitats. The 7800mAh rechargeable battery promises year-long operation under typical usage.
Value for Money: More affordable than the solar combo while retaining core premium features, this model offers flexibility for users who want to add GardePro’s SP350/SP1000 solar panels later. The included 64GB industrial SD card and absence of subscription fees enhance long-term value.
Strengths and Weaknesses: Pros: Industry-leading 165ft WiFi range; massive 7800mAh battery; 4K video and 64MP photo quality; Live View capability; no-glow night vision; no monthly fees. Cons: Solar panel sold separately; WiFi-only connectivity limits remote access; cannot connect to home routers; PC/laptop connectivity not supported.
Bottom Line: Perfect for wildlife enthusiasts who prioritize wireless range and image quality over solar convenience. The ability to upgrade with a matching solar panel later makes this a flexible, cost-effective entry into premium trail camera performance without sacrificing core capabilities.
9. GardePro A3S Trail Camera (Non-Cellular, Non-WiFi), 64MP Photo & 1296P HD Video, 0.1s Trigger, 100ft No-Glow Night Vision, Motion Activated Wildlife Camera

Overview: The A3S represents a back-to-basics approach for purists and remote location deployments where wireless connectivity is impractical. This traditional trail camera focuses on exceptional image quality and battery longevity without the complexity of WiFi or cellular features.
What Makes It Stand Out: The Starvis sensor delivers superior low-light performance with 100ft no-glow infrared range—outdistancing many WiFi-enabled competitors. The ultra-low power design maximizes battery life, while the triple PIR sensor array achieves a rapid 0.1-second trigger speed. Its simplicity eliminates connectivity frustrations and subscription costs entirely.
Value for Money: As the most affordable option in the GardePro lineup, it provides premium image sensor technology without wireless premiums. For researchers managing multiple camera sites or users checking cameras infrequently, the cost savings multiply across deployments.
Strengths and Weaknesses: Pros: Exceptional 100ft night vision; Starvis sensor for low-light clarity; ultra-low power consumption; no subscription fees; simple operation; triple PIR for fast triggering; IP66 waterproof. Cons: No remote access requires physical SD card retrieval; 1296P video lower resolution than 4K models; no real-time monitoring; must manually check each camera.
Bottom Line: Ideal for deep-woods researchers, large property owners, and budget-conscious buyers who prioritize reliability and night vision range over connectivity. The A3S excels where simplicity, extended battery life, and superior low-light performance matter most.
10. MAXDONE Solar WiFi Trail Camera Bluetooth Game Camera, 4K 64MP Wildlife Cameras 2000mAh Built-in Battery Rechargeable Power Hunting Cameras with Night Vision Trail Cam Bluetooth Wi-Fi Deer Cams
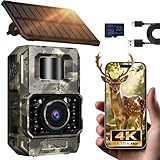
Overview: MAXDONE’s entry into the solar WiFi market targets beginners with an all-in-one package featuring modern connectivity and essential accessories. This camera emphasizes ease of use and comprehensive support for first-time trail camera users.
What Makes It Stand Out: WiFi6 integration with ultra-low power design maximizes battery efficiency, while the detachable solar panel offers flexibility in positioning. The 100° wide-angle lens captures broader scenes, and the TrailCam GO app includes location marking and motion pattern analysis—features rarely seen at this price point. Two-year support provides unusual peace of mind.
Value for Money: The complete kit with mounting hardware and SD card offers immediate usability, though the modest 2000mAh battery raises questions about longevity during cloudy periods. Competitive pricing reflects the newer brand status while delivering contemporary features.
Strengths and Weaknesses: Pros: WiFi6 connectivity; included solar panel; wide-angle 100° lens; 4K video quality; complete mounting kit; 2-year support; location tracking app features. Cons: Small 2000mAh battery capacity; brand reliability unproven; solar efficiency unspecified; 65ft night vision shorter than premium models; limited to 55ft WiFi range.
Bottom Line: Suitable for beginners and casual users in sunny climates where solar supplementation is reliable. The small battery demands careful placement and sunny conditions. Consider this a feature-rich starter camera, but serious users should verify real-world battery performance before committing to remote deployments.
Understanding Long Range Trail Camera Technology
What Defines a “Long Range” Trail Camera
A true long-range trail camera isn’t just about how far it can detect motion—it’s about the entire system’s ability to capture usable intelligence across expansive terrain. The detection range refers to the maximum distance the passive infrared (PIR) sensor can recognize heat and movement, typically measured in feet under ideal conditions. However, for vast hunting grounds, you need more than raw detection numbers. The effective range considers factors like the camera’s field of view, the quality of the lens, and the power of the illumination system for nighttime capture.
Most quality long-range models offer detection zones between 80-120 feet, but the real-world performance varies dramatically based on environmental conditions. Open fields with minimal vegetation allow for maximum range, while dense forests can cut detection capabilities by 30-50%. The key is matching the camera’s specifications to your specific terrain rather than chasing the highest advertised number.
Evolution of Trail Camera Capabilities
The progression from basic motion-activated cameras to today’s long-range powerhouses reflects advances in multiple technologies simultaneously. Early trail cameras struggled with detection ranges beyond 40 feet and produced grainy, low-resolution images that made species identification challenging. Modern units integrate sophisticated PIR sensors with multi-zone detection patterns, high-megapixel image sensors, and advanced LED arrays that dramatically extend both detection and illumination ranges.
For vast hunting grounds, perhaps the most significant advancement has been the refinement of cellular transmission technology. Where you once had to physically retrieve SD cards from remote locations, now you can receive images from cameras positioned miles from the nearest access road. This evolution changes how hunters approach property management, allowing for real-time decision-making based on current animal movements rather than historical data.
How Detection Ranges Are Measured
Manufacturers typically test detection range in controlled environments—flat, open terrain with consistent temperature differentials and no obstructing vegetation. They’ll place a heat source (simulating an animal) at measured distances and determine at what point the PIR sensor consistently triggers. While this provides a baseline for comparison, your actual results will differ.
Temperature variance between the animal and ambient environment significantly impacts detection. On a 70°F day, a deer with a body temperature of 101°F creates a 31°F differential that’s easily detected. But on a 90°F summer afternoon, that same differential shrinks to just 11°F, potentially reducing reliable detection range by 20-30%. Understanding this principle helps you adjust camera placement and expectations based on seasonal conditions across your hunting grounds.
Key Features for Vast Hunting Grounds
Detection Range and Sensing Zones
For covering large properties, prioritize cameras with wide detection zones rather than just linear distance. A unit that detects 100 feet straight ahead but only spans a 30-degree arc misses traffic on the periphery. Look for models advertising 80-100 foot detection ranges with sensing angles of 45-60 degrees. Some advanced cameras feature multi-zone detection that creates a grid pattern, reducing blind spots and improving capture rates of crossing animals.
The vertical detection angle matters equally. Cameras mounted on ridge lines overlooking valleys need sufficient vertical range to catch animals moving below. Similarly, units positioned near water sources should detect approach paths from multiple elevations. Consider the three-dimensional nature of your hunting grounds when evaluating detection specifications.
Trigger Speed Performance
When that mature buck steps into a clearing, a slow trigger speed means the difference between seeing his majestic rack and capturing his tail end as he exits frame. For vast areas where animals might only pass through the detection zone briefly, sub-0.3-second trigger speeds become essential. Anything slower risks missing fleeting moments, especially on trails perpendicular to the camera’s field of view.
The fastest triggers now approach 0.1 seconds, essentially instantaneous capture. However, speed must balance with other factors. Ultra-fast triggers sometimes sacrifice detection range or battery efficiency. For property-wide coverage, aim for trigger speeds under 0.4 seconds while ensuring the camera maintains adequate detection distance and power management.
Recovery Time Between Shots
A buck rarely travels alone, and a doe with fawns creates multiple photo opportunities. Recovery time—the interval between when a camera finishes processing one image and becomes ready for the next—becomes critical for understanding group dynamics and total animal numbers. Standard recovery times range from 1-5 seconds, but premium long-range models can recover in under 1 second.
For vast hunting grounds where you might capture migratory groups or bachelor herds, faster recovery ensures you document the entire party, not just the lead animal. Some cameras offer adjustable recovery settings, allowing you to prioritize either battery life (longer recovery) or comprehensive documentation (shorter recovery). Consider your primary scouting goals when evaluating this feature.
Image Quality and Resolution Standards
Megapixel count doesn’t tell the complete story. A 20MP image from a poor-quality sensor produces worse results than a 12MP image from a superior sensor. For long-range applications, image clarity at distance matters more than raw resolution. Look for cameras with high-quality glass lenses, adequate aperture size for low-light performance, and image processing that maintains detail at the edges of the frame.
Nighttime image quality presents additional challenges. Infrared illumination creates a “snow” effect if the camera’s processor can’t handle the noise. Premium long-range cameras employ advanced noise reduction and automatically adjust IR intensity based on subject distance. For vast hunting grounds where you can’t always position cameras optimally, this intelligent processing ensures identifiable images even when animals trigger the camera at maximum range.
Power Management for Extended Deployments
Battery Life Expectations
Remote cameras on large properties can’t be serviced weekly. Realistic battery life depends on numerous variables: number of triggers, day vs. night photos (night shots consume more power), temperature extremes, and whether you’re using infrared or white flash. In moderate temperatures with moderate activity (15-20 triggers daily), quality cameras should operate 6-8 months on a set of lithium batteries.
Cold weather dramatically impacts battery performance. Alkaline batteries might lose 50% of their capacity at 20°F, while lithium batteries maintain consistent output down to -40°F. For northern hunting grounds where winter scouting provides crucial pre-season intelligence, lithium isn’t optional—it’s essential. Factor battery costs into your long-term budget, as cheap batteries in remote locations often mean missed opportunities and expensive trips to replace them.
Solar Panel Integration Options
For truly remote locations or high-traffic areas that would drain standard batteries quickly, solar panels offer a sustainable power solution. Modern trail camera solar panels integrate seamlessly with compatible units, providing trickle charging that extends deployment indefinitely. The key is matching panel output to the camera’s consumption rate.
Consider panel placement carefully. South-facing exposures in open areas work best, but avoid direct overhead sunlight in desert environments where extreme heat can damage both panel and camera. Some hunters use external battery boxes connected to solar panels, creating a power system that runs for years. This approach works exceptionally well for cameras positioned at pinch points or water sources where animal activity remains consistently high year-round.
External Power Solutions
Beyond solar, external 12V batteries provide massive power reserves for the most demanding applications. Trail cameras designed for external power input can run for multiple years on a single 12V deep-cycle battery. This setup excels for cameras monitoring primary travel corridors, bait sites, or food plots where constant activity would exhaust internal batteries within weeks.
The trade-off involves logistics. External batteries require weatherproof housing and protection from curious bears or other wildlife. Cable management becomes critical—exposed wires invite chewing and damage. For vast hunting grounds where access is limited to seasonal visits, the reliability of external power often outweighs the initial setup complexity.
Image Capture Technology
Flash Types and Night Vision Range
Three primary flash technologies dominate the trail camera market: white flash, standard infrared (low-glow), and no-glow (black) infrared. White flash produces full-color night images but spooks game and advertises the camera’s location to trespassers. For vast hunting grounds where you’re monitoring, not necessarily hunting that exact spot, white flash provides superior identification capabilities.
Infrared flashes extend night vision range while remaining discreet. Standard IR emits a faint red glow visible to animals and humans but generally doesn’t alarm deer after initial investigation. No-glow IR uses 940nm LEDs that are virtually invisible, ideal for security applications or extremely pressured hunting areas. However, no-glow typically reduces illumination range by 15-20% compared to standard IR.
Infrared vs. No-Glow LEDs
The choice between standard IR and no-glow involves trade-offs between range and discretion. Standard IR (850nm wavelength) illuminates subjects more effectively because the sensor is more sensitive to this frequency. You’ll achieve 100+ foot night illumination with quality standard IR systems. No-glow (940nm) sacrifices some reach for invisibility, typically providing 80-90 foot effective range.
Consider your hunting pressure and scouting objectives. On heavily hunted public land or areas with significant poaching concerns, no-glow’s stealth advantage outweighs the reduced range. On private, low-pressure properties where you want maximum identification detail at distance, standard IR provides superior results. Some advanced cameras now offer adjustable IR output, allowing you to customize intensity based on specific location requirements.
Image Sensor Quality
The image sensor, typically a CMOS chip, fundamentally determines image quality regardless of LED power or megapixel rating. Larger sensors with bigger pixels gather more light, producing cleaner images in challenging conditions. For long-range applications, sensor quality becomes more critical than resolution numbers.
Look for cameras with back-illuminated sensors, which move wiring behind the light-sensitive surface, increasing light gathering by 30-50%. This technology dramatically improves twilight and nighttime performance—exactly when many mature animals become active. Combined with quality lens optics, a superior sensor ensures that distant subjects remain identifiable rather than dissolving into pixelated blurs.
Data Management and Connectivity
Cellular vs. Traditional SD Card Models
Cellular trail cameras revolutionize scouting on vast properties by eliminating the need for physical retrieval. Images transmit via cellular networks directly to your phone or email, providing real-time intelligence. However, this convenience comes with ongoing costs and coverage limitations. Traditional SD card cameras remain reliable and cost-effective for areas with good access or where you don’t need immediate data.
The decision often depends on property layout. Use cellular cameras at key observation points—primary trails, water sources, or food plots where immediate information drives hunting decisions. Deploy SD card cameras in secondary locations where monthly visits for data collection fit your scouting schedule. This hybrid approach maximizes coverage while controlling costs.
Data Plan Considerations
Cellular trail cameras require data plans, typically ranging from $5-20 monthly depending on image volume and resolution. Most carriers offer tiered plans: basic options for low-resolution thumbnails, premium plans for high-resolution downloads and HD video transmission. For vast hunting grounds with multiple cameras, unlimited or pooled data plans often prove more economical than individual basic plans.
Consider seasonal adjustments. Some carriers allow you to pause plans during off-season months, saving money when you’re not actively scouting. Others offer reduced rates for annual commitments. Factor these recurring costs into your total camera ownership budget—a $150 camera with a $15 monthly plan costs $330 after one year, making a $300 camera with free data transmission potentially more economical long-term.
Image Transmission Reliability
Cellular transmission success depends on signal strength, which varies by carrier, terrain, and vegetation. Before deploying multiple cellular cameras, test signal strength at potential locations using your phone. A single bar of signal might suffice for text transmission but struggles with image files. Some cameras feature external antenna ports, allowing you to mount higher-gain antennas for improved reception in marginal areas.
Transmission protocols matter. Cameras that compress images before sending use less data and transmit more reliably in weak signal areas. Some models queue images during signal outages and transmit in batches when connectivity returns. For vast, mountainous hunting grounds where signals come and go, this store-and-forward capability ensures you don’t lose valuable intelligence during temporary outages.
Durability and Weather Resistance
IP Ratings Explained
The Ingress Protection (IP) rating system defines how well a camera withstands dust and water intrusion. For trail cameras exposed to years of weather extremes, IP66 or IP67 ratings provide necessary protection. IP66 means complete dust protection and resistance to powerful water jets—essentially waterproof against rain and snow. IP67 adds temporary submersion protection, beneficial for cameras in flood-prone bottomlands.
Don’t overlook the battery compartment seal. Many cameras fail not because the main housing leaks, but because the battery door gasket deteriorates or doesn’t seal properly. Quality long-range cameras use dual-seal systems or place batteries within the main sealed compartment rather than a separate door. This design detail significantly impacts long-term reliability across vast properties where you can’t inspect every camera after each storm.
Camouflage and Concealment
On extensive hunting grounds, cameras run for months undisturbed, but only if they remain unnoticed by both wildlife and trespassers. Effective camouflage patterns match your regional vegetation—forest cameras need different patterns than those deployed in sagebrush or agricultural settings. Break up the camera’s outline with natural vegetation, but ensure it doesn’t obstruct the lens or PIR sensor.
Consider the human element. On large properties with multiple access points, trespassers pose a real threat. Position cameras high (8-10 feet) and angle them downward to reduce theft risk while maintaining detection capability. Use no-glow IR models in areas where you suspect human activity. Some hunters deploy dummy cameras in obvious locations while concealing real units nearby, protecting their investment while still gathering intelligence.
Build Quality for Harsh Conditions
Vast hunting grounds span diverse microclimates—from windswept ridges to humid bottomlands. Cameras must withstand temperature swings from -20°F to 120°F, ice, snow, torrential rain, and baking sun. Look for units with reinforced mounting brackets that won’t crack in cold weather, metal lock boxes that protect against bear damage, and UV-resistant plastics that don’t become brittle after two seasons.
The lens cover quality often separates durable cameras from disappointments. Cheap plastic covers scratch easily, degrading image quality over time. Quality units use tempered glass or high-grade polycarbonate with scratch-resistant coatings. On large properties where cameras remain deployed year-round, this attention to materials science determines whether your investment lasts three months or three years.
Placement Strategies for Maximum Coverage
Height and Angle Optimization
Conventional wisdom suggests mounting trail cameras at 3-4 feet for deer, but long-range applications on vast properties benefit from elevated placement. Mounting cameras 8-10 feet high and angling them downward extends the effective detection zone across open terrain while keeping units above the line of sight of most animals and people. This height also reduces vegetation triggers from swaying grass and shrubs.
The downward angle compresses the scene, bringing distant objects into clearer focus while widening the effective detection area. For ridge-to-ridge surveillance or overlooking large meadows, elevated mounting transforms a standard detection range into property-wide coverage. Use sturdy screw-in mounts rather than straps, which allow cameras to shift in wind and weather, ruining your carefully planned angle.
Accounting for Terrain and Vegetation
Vast hunting grounds rarely feature flat, open terrain. Your placement strategy must account for elevation changes, thermal currents, and seasonal vegetation growth. In mountainous terrain, position cameras on north-facing slopes where thermal currents remain more consistent, improving PIR sensor reliability. Avoid southern exposures where direct sunlight can heat rocks and trees, creating false triggers.
Vegetation management around cameras becomes a seasonal chore. Spring and summer growth can reduce detection ranges by half if left unchecked. Visit cameras quarterly to trim vegetation within the detection zone. Focus on removing branches that might wave in the wind and create false triggers, while leaving some natural cover for concealment. On properties too vast for frequent visits, position cameras in areas with natural barriers—rock outcrops, cliff faces, or open water—that limit vegetation encroachment.
Creating a Camera Network
Rather than randomly placing cameras across vast acreage, think strategically about creating an interconnected network. Identify primary travel corridors—ridge lines, river crossings, saddles between peaks—and position cameras to monitor these highways. Then place secondary cameras at feeding areas, water sources, and bedding zones that connect to these main routes.
This network approach builds a comprehensive picture of animal movement patterns. When you capture a buck on a ridge camera at dawn, then see him again at a water source camera midday, you begin understanding his entire range and routine. Over time, this intelligence proves far more valuable than random snapshots. On properties exceeding 1,000 acres, a network of 8-12 strategically placed cameras provides better scouting data than 20 randomly positioned units.
Legal and Ethical Considerations
Understanding Local Regulations
Before deploying any trail camera network, thoroughly research state and local regulations. Some states prohibit cameras during hunting season, others restrict cellular cameras that transmit real-time data, and a few require registration of any camera placed on public lands. Regulations change frequently, and ignorance isn’t a valid defense if you’re cited.
On private property, you generally have broad authority, but still consider ethical implications. Don’t position cameras to peer into neighboring properties or public roads where privacy expectations exist. If your vast hunting grounds border other private land, communicate with neighbors about your camera placement. This courtesy prevents misunderstandings and sometimes reveals shared wildlife patterns that benefit everyone’s hunting success.
Privacy Concerns on Public Lands
Using trail cameras on public hunting lands introduces additional ethical considerations. Many hunters feel trail cameras violate the fair chase principle, giving technologically equipped hunters an unfair advantage. While legal in most areas, consider the hunting culture and expectations in your region. Over-reliance on cameras can create resentment among traditional hunters who scout through boots-on-the-ground effort.
If you do deploy cameras on public land, use them for pre-season scouting and remove them during peak hunting periods. This compromise respects fair chase concerns while still leveraging technology for property-wide reconnaissance. Never place cameras in a way that monopolizes an area or creates conflict with other hunters who have equal rights to the resource.
Ethical Wildlife Monitoring Practices
Vast hunting grounds often support diverse wildlife beyond your target species. Trail cameras provide incredible opportunities for documenting ecosystem health, predator-prey relationships, and rare species presence. Approach this monitoring responsibility ethically. Avoid baiting locations excessively just to get photos, as this can alter natural movement patterns and create dependency.
Consider sharing non-sensitive data with state wildlife agencies. Many agencies lack resources for comprehensive population surveys across large landscapes. Your camera network could provide valuable data on species distribution, herd composition, or invasive species presence. This collaboration often builds positive relationships and contributes to broader conservation efforts beyond your individual hunting success.
Maintenance and Troubleshooting
Seasonal Maintenance Checklist
Vast properties require seasonal maintenance visits rather than monthly checks. Create a systematic approach: each season, inspect every camera for damage, test battery voltage, clean lenses and PIR covers, trim vegetation, and verify mounting security. Bring replacement batteries, desiccant packs to control internal humidity, and backup SD cards for traditional models.
During these visits, download all images and review them on a tablet in the field. This immediate review often reveals placement issues—maybe you’ve been getting hundreds of squirrel triggers because the angle is too low, or perhaps wind-blown grass creates constant false alarms. Adjust camera settings or positioning based on this field analysis rather than waiting until you’re back home reviewing images on a computer.
Common Issues in Remote Locations
Cellular cameras in remote locations frequently suffer from weak signals that drain batteries as the unit repeatedly attempts to transmit. If you notice rapid battery drain, check signal strength and consider relocating the camera or adding an external antenna. Another common issue involves condensation inside the lens or PIR cover, which usually indicates a compromised seal or missing desiccant pack.
On vast properties, bears pose a significant threat. Even “bear-resistant” boxes sometimes fail against determined bruins. If you suffer bear damage, relocate the camera and consider additional protective measures like electric fencing around high-value locations. Some hunters suspend cameras from high branches using cables, keeping them completely out of reach while maintaining downward angles for effective monitoring.
Firmware Updates and Longevity
Manufacturers regularly release firmware updates that improve detection algorithms, reduce false triggers, or enhance image quality. For cameras deployed across vast properties, establish a routine of checking for updates during seasonal maintenance visits. Most updates install via SD card, a simple process that takes minutes but can significantly improve performance.
Consider the long-term support lifecycle before purchasing. Cameras from established manufacturers typically receive firmware updates for 3-5 years after release. Off-brand bargains might never see updates, leaving bugs unresolved. On vast hunting grounds where cameras represent a significant investment, choosing manufacturers with proven support records ensures your network remains functional and current for years rather than months.
Budget Considerations and Value
Price vs. Performance Trade-offs
Long-range trail cameras range from under $100 to over $600, with dramatic differences in performance and durability. Budget models might advertise impressive detection ranges but use inferior sensors that produce unusable images at distance. Premium units command higher prices through better build quality, more reliable components, and superior customer support.
For vast hunting grounds, the cost of failure exceeds the price difference between budget and premium cameras. A cheap camera that fails in a remote location costs you not just the purchase price, but also the fuel and time for an unnecessary trip to replace it. Calculate total cost of ownership including batteries, data plans, and your time. Often, spending 30% more upfront saves money within the first year through reduced maintenance and fewer failures.
Long-term Investment Perspective
Think of your trail camera network as a multi-year investment in property intelligence. Quality cameras last 5-7 years with proper care, while budget models often fail within 2-3 seasons. Spread the initial cost across the expected lifespan: a $400 camera that lasts 6 years costs $67 annually, while a $150 camera replaced every 2 years costs $75 annually—and that’s before factoring in the lost scouting data during failures.
On vast properties, standardize on one or two camera models rather than buying various brands. This simplifies maintenance, reduces the spare parts and batteries you need to stock, and makes troubleshooting easier. When you find a reliable model that performs well in your specific terrain and climate, gradually build your network around that proven platform.
Warranty and Support Importance
Comprehensive warranties indicate manufacturer confidence in their product. Look for at least 2-year warranties covering manufacturing defects and water intrusion. Some premium manufacturers offer 3-year warranties with advance replacement programs—critical for remote deployments where waiting weeks for repairs isn’t acceptable.
Evaluate customer support before purchasing. Can you reach a knowledgeable human by phone? Do they offer troubleshooting guides specific to your region’s challenges? On vast hunting grounds where you’re managing multiple units, responsive support proves invaluable. Check hunting forums for real-world warranty experiences; some companies enthusiastically honor claims while others find excuses to deny coverage.
Frequently Asked Questions
How many trail cameras do I need for 1,000 acres of hunting ground?
The optimal number depends on terrain complexity and scouting objectives, but most hunters find that 8-12 strategically placed cameras provide excellent coverage for 1,000 acres. Focus on creating a network that monitors primary travel corridors between bedding and feeding areas rather than randomly distributing cameras. Start with 4-6 units covering main routes, then add secondary cameras at water sources, mineral sites, and transition zones as budget allows.
What’s the realistic detection range I should expect in wooded terrain?
In dense forest with significant understory, expect actual detection ranges of 50-70 feet even from cameras advertising 100+ foot capabilities. Vegetation, temperature variations, and reduced sight lines all impact performance. In open hardwoods with minimal undergrowth, you might achieve 80-90 foot reliable detection. Always test new camera locations by walking the detection zone at various distances to verify real-world performance before committing to long-term deployment.
Are cellular trail cameras worth the monthly cost for large properties?
Cellular cameras provide exceptional value on vast hunting grounds by eliminating travel time and fuel costs associated with manual SD card retrieval. If accessing remote cameras requires a 2-hour round trip, a $15 monthly data plan pays for itself in saved gas after just two months. The real value, however, comes from real-time intelligence that allows you to make immediate hunting decisions based on current animal locations rather than week-old data.
How do I prevent bears from destroying my trail cameras?
Use metal lock boxes secured with lag bolts rather than straps, mount cameras at least 8 feet high when possible, and consider adding electric fencing around high-value locations. Some hunters apply bear repellent sprays to camera housings, though effectiveness varies. In extreme bear density areas, suspend cameras from cables between trees, keeping them completely out of reach while maintaining proper downward angles for monitoring.
What’s better for long-range detection: more megapixels or better lenses?
Lens quality and sensor size dramatically outweigh megapixel count for long-range identification. A 12MP camera with a sharp, fast lens and large sensor produces clearer distant subjects than a 30MP camera with a cheap lens and small sensor. Focus on cameras with quality glass optics, wide apertures (lower f-numbers), and back-illuminated sensors. These components ensure distant animals remain identifiable rather than dissolving into pixelated blurs.
How often should I check trail cameras on remote hunting grounds?
On vast properties with difficult access, seasonal checks (every 3-4 months) often suffice if you’re using lithium batteries and have adequate storage capacity. Cellular cameras reduce the need for physical visits to retrieve data, but still require biannual maintenance for battery replacement, vegetation trimming, and damage inspection. Avoid checking cameras more frequently than necessary, as human scent and disturbance can alter animal patterns around camera sites.
Can I use trail cameras for security on my hunting property?
Trail cameras excel at property surveillance, monitoring access points, detecting trespassers, and watching equipment caches. Use no-glow IR models to avoid alerting intruders, mount cameras high with downward angles, and consider cellular models that send real-time alerts. Many hunters successfully use their scouting camera network for dual purposes, positioning some units to monitor gates and access roads while others focus on wildlife patterns.
What’s the best height to mount trail cameras for deer on large properties?
While conventional advice suggests 3-4 feet, for vast properties where cameras monitor open terrain and long corridors, mounting 8-10 feet high with a downward angle provides superior results. This elevation extends the effective detection zone, reduces vegetation triggers, and keeps cameras above the direct line of sight of most deer and human visitors. Ensure the camera’s detection zone still covers the target area; you may need to angle the PIR sensor downward on some models to compensate for the increased mounting height.
How do temperature and weather affect trail camera detection range?
Temperature differentials between the animal and environment drive PIR sensor performance. Larger temperature swings (cold mornings, hot afternoons) reduce reliable detection distance because the sensor struggles to distinguish animal heat from background thermal noise. Rain and heavy humidity can reduce detection range by 10-20% by scattering infrared signals. For consistent performance across seasons, position cameras in areas with stable thermal environments, like north-facing slopes or shaded corridors.
Should I use video mode or photo mode for scouting vast hunting grounds?
Photo mode generally provides better battery life and faster trigger speeds, making it ideal for high-traffic areas and long-term deployments across large properties. Video mode excels for understanding behavior—scraping sequences, territorial disputes, or predator interactions—but consumes 3-5 times more battery and storage. A hybrid approach works best: use photo mode on most cameras for population surveys and pattern documentation, while deploying a few select units in video mode at key locations like scrapes or mineral sites where behavioral intelligence proves most valuable.
Related Buying Guides
- 10 Game-Changing Long Range Trail Cameras for Vast Terrains in 2026
- 10 Best Budget Hunting Trail Cameras Under $100 for Casual Scouting in 2026
- 10 Best Budget Hunting Trail Cameras Under $80 for New Hunters in 2026
- 10 Best Hunting Trail Cameras After 6 Months of Field Testing in 2026
- 10 Best Hunting Trail Cameras After 6 Months of Testing in 2026